Religion/Caste/Qualification etc ( Settings )

This is an important topic on how to add Religion/Caste/Qualification etc and configuration.
Your matrimony business may be specific to some Religion/Castes or specific region, so this software does not have any default Religion/Caste etc. You need to add them to settings. For example, there are thousands of different "Qualifications" and many kinds of "Job" so you need to add those to settings.

Please note, you do NOT required to add all Castes/Qualifications/Jobs etc.

You can add any time when required, so PLEASE DO NOT add all Religion/Caste etc which are not required. 

If you add unwanted data in settings, the software will perform very badly, keep this in mind.

For example, if a new customer comes to you whose "Job" is 'Carpenter', at that time you can add this 'Carpenter' Job to settings. 

Otherwise don't add all kinds of 'Jobs' in the world.

Also, this is same for Religion/Caste/Qualification/Job/State/District etc.


Settings Menu :  You need to configure System Settings. It depends on how this application runs. As these are Settings secured and protect from authorized changes to application. You need to provide the same password as user logged in.


Enter the User Login Password, to Add/Modify/Delete System Settings.
Please note you cannot delete system setting if that setting is used by some profile in database.


Add: You need add these entries here, so that they will be available in application.  
Modify: You can modify the names at any time. 
Delete: You can delete any entry if that is not used by any membership. 

IMPORTANT POINTS:  
DO NOT 
1. Don’t create duplicates. For example, B.A and BA. 2. Do not create all entries at one time, instead add only when required. 
Matrimony Application 

Dos 
1. Create only entries which are required. You can add new entries any time. So, don’t create all entries now. Instead create a new entry when a member comes with new item. For example you have created Education as B.A and B.Com, now a new member came his/her education is B.E. Then at that time just create a new entry. This will make you less confusion and more robust application. 


These are the System settings for every registered member requires
These are the System settings for every registered member requires. 
For example to add new Education say B.Tech,  
1. Select “Education” in the left side list box. 
2. Click on Add Button, a new dialog box pop’s up as below 

3. Enter the new Education B.Tech in the text box, then click Ok. 

Similarly, you can all the entries when you required. Click on Save button to save your changes. To Cancel, click on Cancel button. 

Add New Registration

Adding New Registration for a Bride or a Groom can be done from New Registration Menu. To Create a new Bride or Groom profile select the sub menu items.


 Click Main Menu “New Registration” then select Bride or Groom Sub Menu, and then Click on “New” menu.
Enter all the details as shown in the sample below and click Next.


Partner Requirements Page: In this page, a member can set his/her match preferences such as Age, Education, Job etc.
Adding Profile Pictures we can add up to four profile pictures, by clicking “Add Picture” Button.


PLEASE NOTE ALL THE PROFILE PICTURES ARE STORED IN FOLDER  C:\ProgramData\TulipMatrimony\Data\Branch_<branchcode>. For example your branch code is ABC then pictures will be stored in C:\ProgramData\TulipMatrimony\Data\Branch_ABC. Uninstalling the TulipMatrimony software will NOT delete this folder. It is your responsibility to take regular backup of this pictures.
Setting Main Picture: To set the main picture, right click on a picture and click on “Set as Main Photo”, this will appear  as first picture in the profile.
Deleting a Picture:  To delete a picture, right click on a picture and click on “Delete Photo”, this will delete picture. 

How to Add/Modify Profile Picture

A Profile Pictures can be add in New Registration Page or Modify Page.

Up to 6 pictures can be added.

Add New Picture :
  1. Click on Add Picture Button, this opens File Selection Dialog.
  2. Select the file JPG and click 'Open' button. A picture will be added.
  3. You can add up to 6 pictures.
Selecting Profile/Main Picture : The Main picture will show up first in all pages and also will be used as thumbnail pictures in some views.

Setting Main Picture:
  1. Place the mouse on the picture and then right click on that picture.
  2. A menu will pop on as shown in below picture select 'Set as Main Photo'.
Deleting a Picture:
  1. Place the mouse on the picture and then right click on that picture.
  2. A menu will pop on as shown in below picture select 'Delete Photo' to delete that photo.


Update Bride/Groom Profiles

There may be cases we need to update customer profiles when required. For example, customer has changed his address, or got a new Job or higher education. Sometimes, we may not get full details at the time of registration. So there are many cases we need to update the profiles.


1. Select any one row from the Profiles Gird, and then Click "Modify" button at the top.
2. Then Add or Modify the data as described in "New Registration" and then Click Finish button to Save.


Update Partner Requirements

Every Profile can set their own preferences such as Religion/Caste, Job/Education, Age and many more choices.

These preferences can be set at the time of New Registration or can modify later at any time by "Modify" operation. See the how to modify http://softwarematrimony.blogspot.com/2017/11/modify-registration.html


Select requirements for the matching profiles.
Stars requirement is automatically selected by customer's star, but you can select or un-select by the customer specific requirement.
Height Requirement : between the heights of From and to, example 5ft to 5ft 10in.
Monthly salary/income requirement : example 40,000/- to 50,000/-

These requirements are shown in full details page of the profile.


View Bride/Groom Profiles.

Steps to View Bride/Groom Profiles: After you add new registrations, you can view all the profiles as described below.

Please check the blog for creating new registrations for full details.
http://softwarematrimony.blogspot.com/2017/11/add-new-registration_27.html
http://softwarematrimony.blogspot.com/2017/12/religioncastequalification-etc-settings.html

In the main page, click Bride or Groom to View profiles in Table Form. This table shows the main details of the person such as name, date of birth, Religion, Qualification etc. This table will not show email id and phone numbers. The profile pictures are shown as thumbnails in left side of the table.
See the below You Tube video for complete functionality.

To view all details including phone number etc. Select the row in the table and click "Show Details" button in the left side of the table above thumb nails pictures.

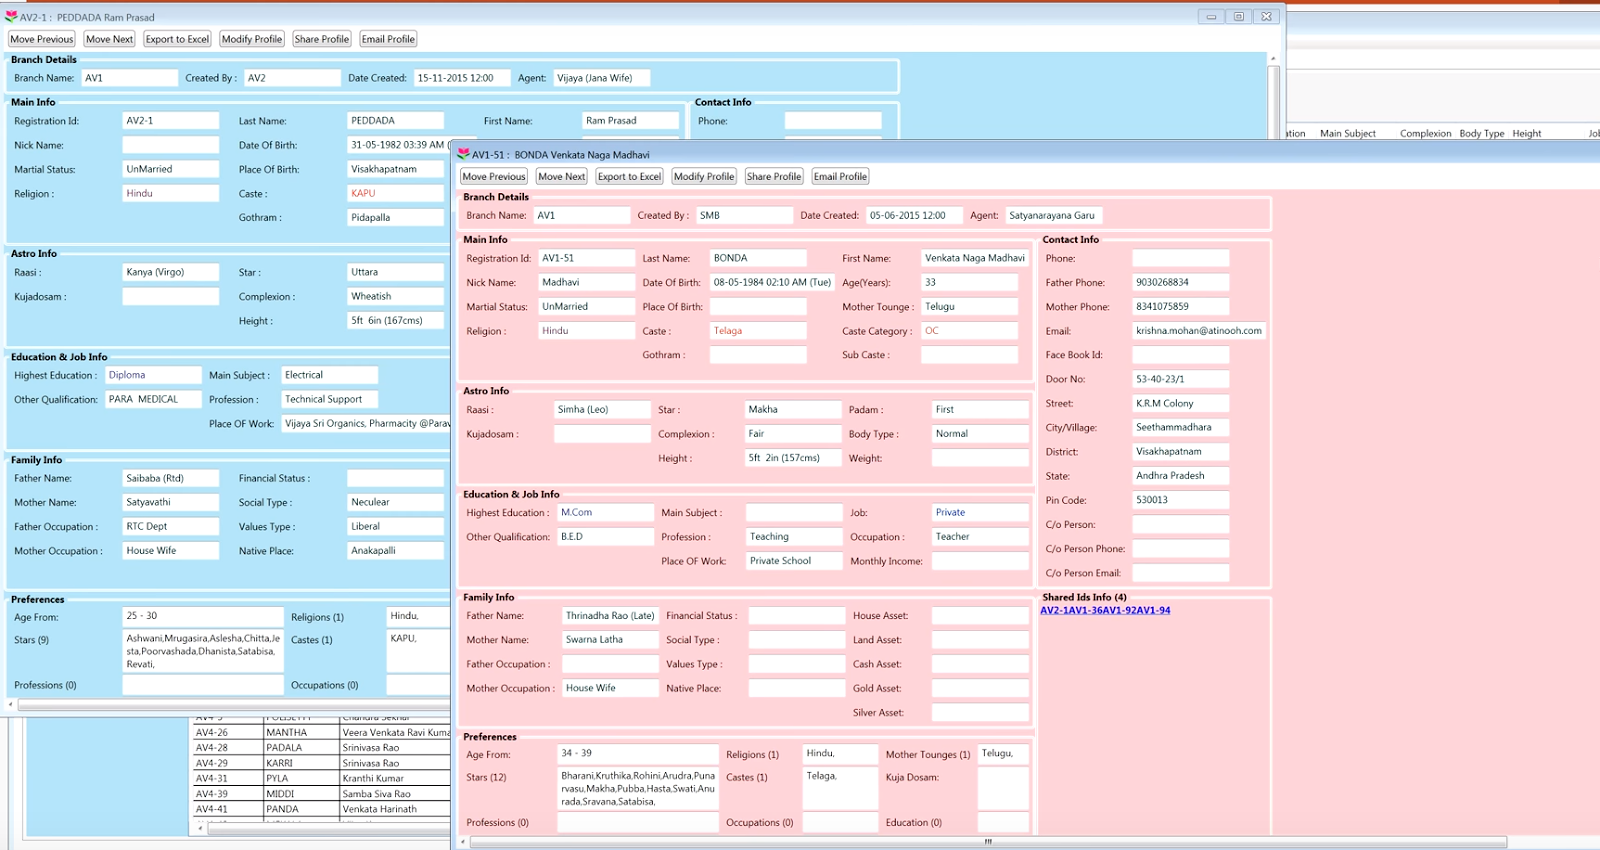
This view shows complete details of the person in one page, including profile pictures, address, phone numbers, emails, partner preferences etc.

You can also navigate the profiles previous or next by clicking the navigation buttons at the top of this page. This is very useful feature to see full details one by one .


Another important feature is the details of profile sharing, which means, if you share a profile with other person it will recorded under "Shared Profiles id". So we can easily know to whom all this profile is shared, by clicking that link shared profile registration id, it will that to that person profile.


Search Profiles with Pictures

Search Profiles with Pictures

Here are many search options and other important functionality such as sharing profiles between bride and grooms is easy.

Steps to View the profiles along with pictures.
Note : You must select Bride or Groom Radio button to use this search feature.

  1. Click on the Search Tab Page.
  2. It's optional to select any filters such as Age, Religion, Job etc.
  3. Click on "Search" Button as shown below.
  4. The Bride/Groom profiles will be show along with pictures. 


Software Download Links below, WhatsApp : 0014253010132 (preferred) or Contact 9290006827

Matrimony Software is Free to everyone. Our software runs on Windows Operating System and SQL Express Database. Supported Operating Sys...